It's a simple trick that makes the tread texture move along the mesh, simulating tread movment.
As you are applying the texture in RenX, in the material editor under Pass 1, Vertex Material tabs, you have the Stage 0 Mapping section. There, drop the box down aside Type: and select Linear Offset. In the box immediatly below, type in:
VPerSec=1
Then continue to apply your material as normal and line it up with UVW Mapping. It wont be moving in gMax.
Export to W3D, and take a close look. If the tread is moving sideways, replace the V in the code with a U or W. If the tread is moving backwards, place in negative 1 after the equals sign. If the tread isn't moving, start again and type it right, it is case sensitive. If that fails it's a mesh name/ini problem, but in my experience getting the treads moving is rarly the problem. Getting them to stop is a problem which sparks up much more often.
I actually notice that these lines in the INI make the treads stop when the tank does:
  TreadAnimationRate = 1.0; ammount of tread texture to move per second
   TreadDriveSpeedFraction = 0.3; fraction of locomotor speed below which treads stop moving.
   TreadPivotSpeedFraction = 0.6; fraction of locomotor speed below which we allow pivoting.
As long as your tread meshes are named
TREADSL01
and
TREADSR01
it'll work.
(Thanks to TopKnot for this next bit:)
Also to further simplifly this whole "tread" issue, here are some "rules" that should be followed:
- Always design your Treads to run from Left to Right of your texture map
- It's best to take the tread texture and have it reach both left and right side completely
- You need to seperate the mesh faces that you want to texture as the treads, otherwise you'll find other parts of your model's uv's moving as well
- They need to be named according to what side they are on: Hense Right side = TREADSR01 & Left Side = TREADSL01. This is also needed for like when the tracked vehicle pivot's to turn, then the treads counter rotate to eachother for a more real effect.
- Make sure all your faces you're mapping FLOW in the same diretion, meaning that if you select all the faces in the uv edior and slide them left to right your viewport should show the textures all sliding in the same direction. Otherwise you'll get some faces going one was and others going opposite and no manner of V or U Persec's will fix it..
- You can overlap your faces but I find giving them as much texture space from left to right in a row not overlapping makes for a much prettier look and feel in game.
If you follow these guidelines then you'll have no problems getting them working. It is the easiest method to do it. Trust me I've done over 22 tanks now for Blitz 2 and I know it by heart now
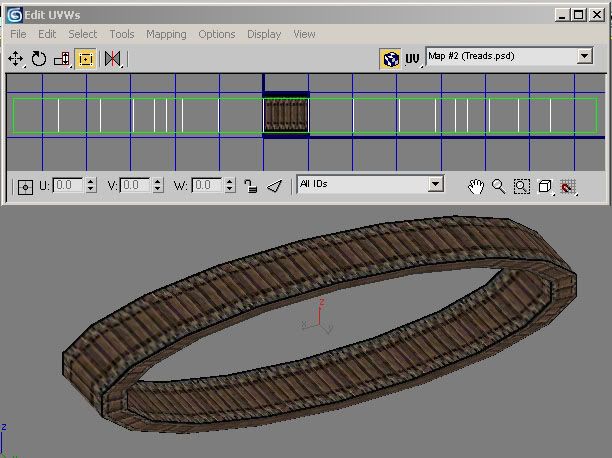
Here's an example of how you can save texture space for your main object and keep your treads all in one nice single texture:

Then you can select any type of tread so you desire by simple moving up or down the strips..
(Thanks KeyOp for this bit:)
As UVs are tiled, you can also map the treads to a single tiny bitmap like: