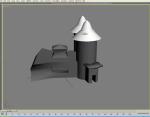
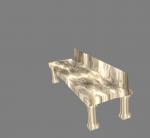
So you have an object. Nice barn. =D
This is what I do, I'm still learning and there is a lot to learn believe me.
You will need to UV map the object by using the UV modifiers (I use UV map to get the mapping started and UV unwrap to move the maps to where I want them.)
- top bar -> Modifiers -> UV Coordinates
In Material Editor you can create the material/s that the model will use
- top icon bar -> Material Editor (icon with four coloured spheres) -> click Standard -> choose DirectX 9 Shader
- under the DirectX 9 Shader heading click the large button and find C:\Program Files (x86)\Autodesk\3dsMax8\maps\fx\BFME2
- open NormalMapped.fx and add the Diffuse Texture (the texture with the colour and detail) and the Normal texture (a purple-ish image that adds highlight and shadow detail, these use the same filename as the diffuse but with a _nrm at the end)
- Change the Specular Color to dark, because otherwise the shine from the Normal Texture is too much. Under the Technique heading change the Technique to Default. Specular Exponent is how large the shine is.
- To apply the texture to your selection look for the small icon with a sphere with an arrow pointing to a cube. It is called Assign Material to Selection
There is a tutorial here somewhere that will give you pictures and in depth details about the settings. I'm sure it was made by Nerta and was about normal mapping a Dwarven barracks for The Dwarf Holds.
I UV map while I'm applying textures, my process is that I'll select what I want to be all one material and apply the material, then I'll add a cube UV map with the dimensions of the cube the same (so instead of being a rectangular prism that encases the selection it is actually a cube). To apply this I'll right click the selection and convert to editable mesh. The next step in UV mapping is selecting only what I want to work on (the other parts will only get in the way) and then UV unwrapping. Then, and this is the part I dislike, I align the coordinates of the UV map to where I want them on the texture. Click Edit to get the UV mapping window where you can select points, edges or faces (buggy).
Save often but remember that the saved .max file might become corrupted during the save, so also export your model as a .w3d (which can also become corrupted). Best of luck
To create objects and UV maps I use Blender and export to 3ds Max 8 with an .obj file, Applying materials and exporting to .w3d format can only be done in 3ds Max 8 or 7.
As a disclaimer I'm still very new to this too so I might be giving very bad advice! =p
Remember that all worlds draw to an end and that noble death is a treasure which no one is too poor to buy. - C.S. Lewis
There will come a time when you believe everything is finished. That will be the beginning. - Louis L'Amour
What will matter then will be people. If relationships will matter most then, shouldn't they matter most now? - Max Lucado
![]()
![]()


